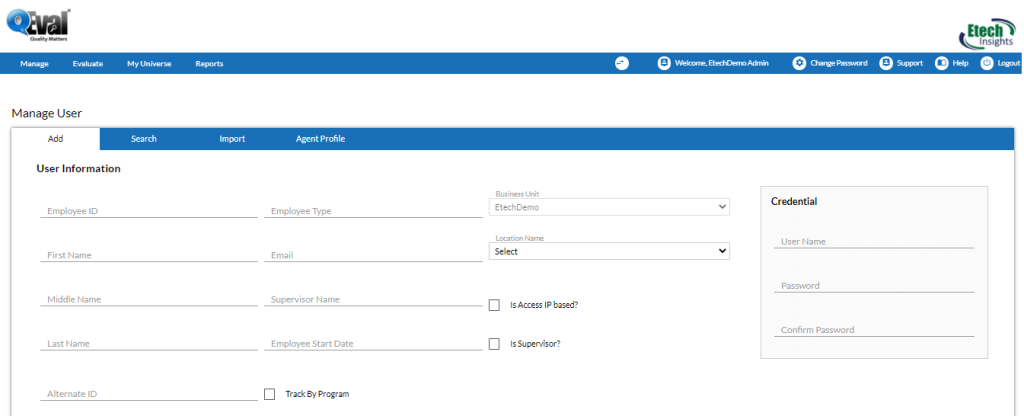
An add user page allows an admin to add a new user of particular role within QEvalPro system. An admin has the option to check the checkbox if the newly added user is an employee of Etech. Thus, the functionality helps the managers to identify Etech’s employee and third party employees. Also, when a user is added, the page allows an admin to provide various access rights to the user based upon requirements.
A new user will not be added in QEvalPro system, unless an admin mentions his credentials in the required fields.
To add user follow the steps given below:
1.Click Add tab to add a user and the following screen appears-

2.Provide the following details.
|
Screen Elements |
Description |
|
Employee ID |
Provide ID of the employee. |
|
Employee Type |
Provide the type of employee. |
|
Business Unit |
By default, the business unit is already selected and is disabled. |
|
First Name |
Provide first name of the user. |
|
|
Provide the Email address. |
|
Location Name |
Select the location from dropdown list. |
|
Middle Name |
Provide middle name of the user. |
|
Supervisor Name |
Provide supervisor’s name of the user. |
|
Is Access IP based? |
Check to allow access to Users based on IP Address. Note: Selecting the check box restricts the User, accessing QEval from any other IP Address. |
|
Last Name |
Provide last name of the user. |
|
Is Supervisor? |
Select the check box if the user is a Supervisor. |
|
Program |
Select the Program from the list. |
|
Partner |
Select the Partner from the dropdown list. |
|
Access Rights |
|
|
Role |
Select the Role of the user to restrict or allow access rights.
Note: Based on selected Role, related rights are displayed. Further, more options can be selected from the related rights. |
|
Credential |
|
|
User Name |
Provide the User Name.
|
|
Password |
Provide password.
Note: The password should meet the below requirements.
•Must be at least 8 characters. •Must contain at least one digit, one lower case letter or one upper case letter and one special character. •Valid special characters are: -_,.?/:;|\\!@#$%^&*()-+=. •For example: Effective1?. |
|
Confirm Password |
Re-enter the password for confirmation. |
3.Once done, click ![]() button to add user or click
button to add user or click ![]() button to reset the fields. On clicking submit button the following confirmatory message is displayed as shown in the screen below.
button to reset the fields. On clicking submit button the following confirmatory message is displayed as shown in the screen below.

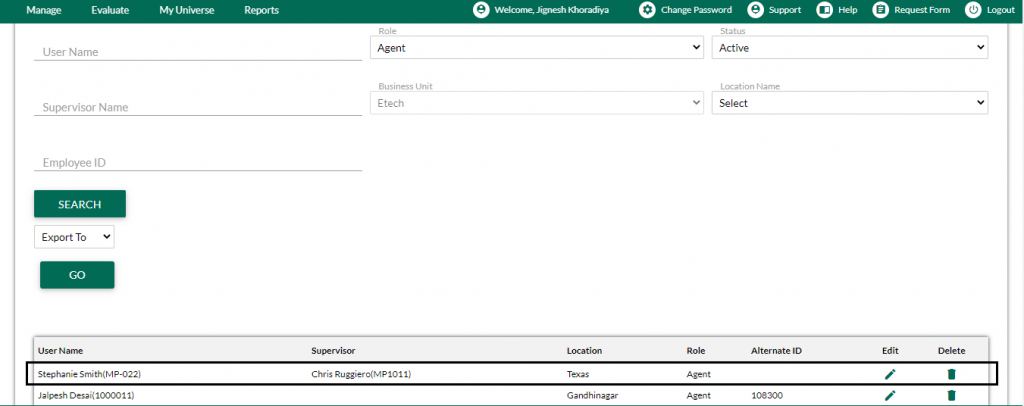
4.The newly added user is visible in the Search tab as shown in the screen below.

Video