When the user selects the “Add” tab of the Manage Screen, he will be redirected to the following screen-
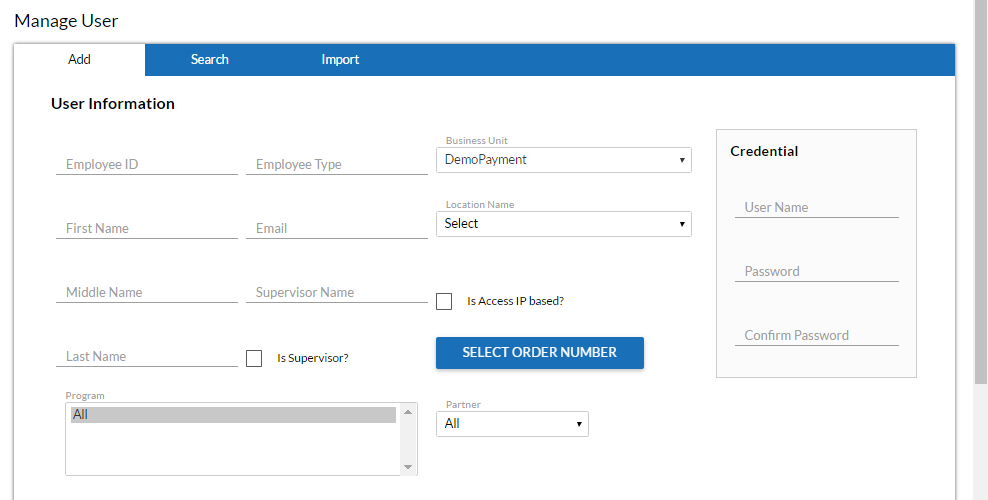
Apart from the displayed elements on the screen, the licensed user would now also have some added permissions on the screen.
By selecting the ![]() option, the licensed user will be redirected to following screen-
option, the licensed user will be redirected to following screen-
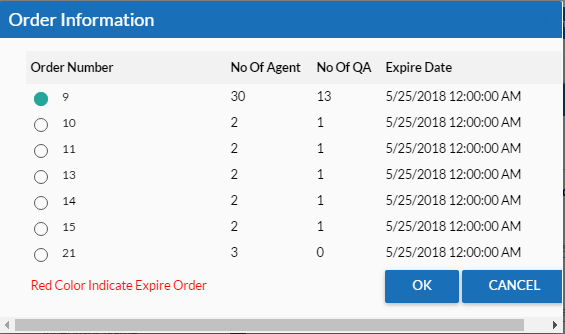
The screen displays the following elements to the licensed user-
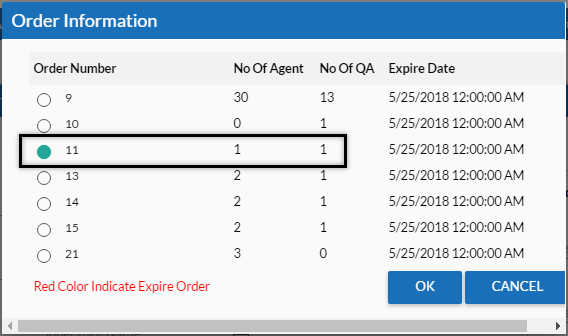
•Order number– This is an anonymous number. Regardless of the order number displayed in the screen, it could be numeric or alphanumeric depending upon the order sequence.
•No. of Agent– This field displays the total number of agents that are allowed to be added by the licensed user.
•No. of QA– This field displays the total number of QA which are allowed to be added by the licensed user.
•Expire Date– The field displays the expiry date and time of the license purchased by the user.
The licensed user has particular restrictions based upon the number of entries made for users under the categories Agent and QA.
Note- The table allows to select only one user at a time
To make an entry for a new user in the system, the licensed user needs to select a particular order number from the list of orders as shown-
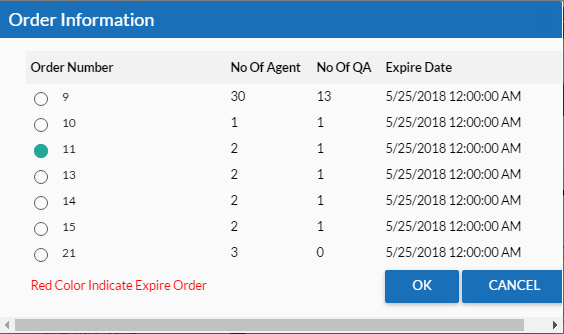
Select ![]() and you will return back to the add user screen. In order to add a user, the license user needs to make entries for the provided fields in the screen as shown-
and you will return back to the add user screen. In order to add a user, the license user needs to make entries for the provided fields in the screen as shown-
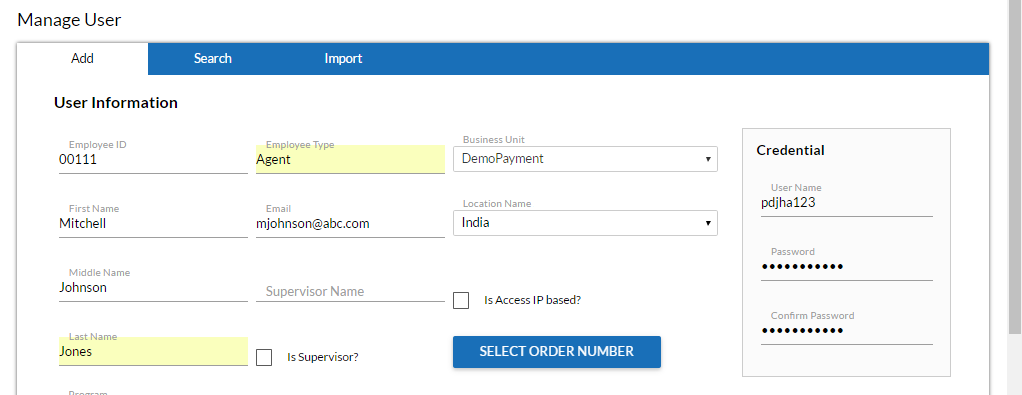
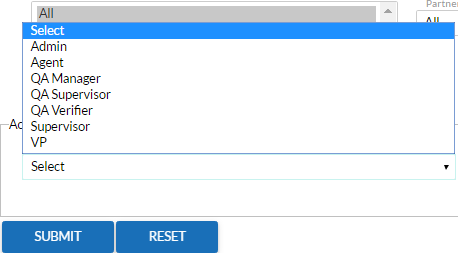
Also, the licensed user needs to select the role of the new user from the drop down box in the same screen as shown in the figure-
After making entries, submit the records using ![]() button. The browser would then show the confirmation message as-
button. The browser would then show the confirmation message as-

Once an entry has been made, the number of agents allowed to be created by the licensed user is reduced by one from the selected order number as shown-
Video